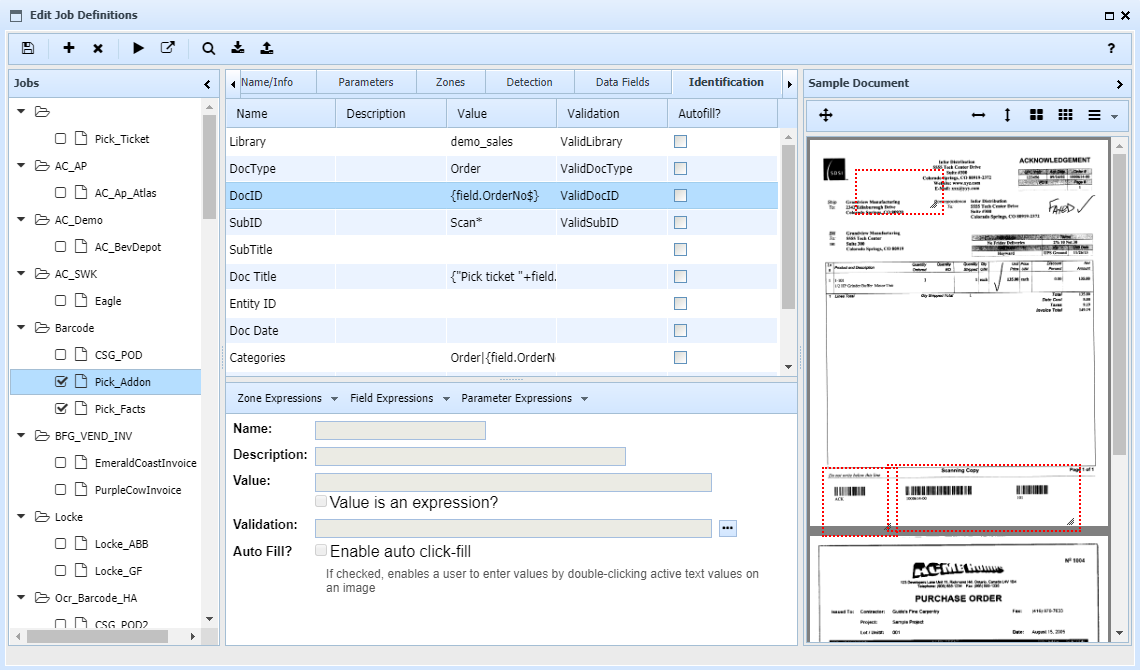
Jobs are created and edited using the Job Configuration window. There are three panels in this window. The left panel shows existing jobs, organized by category. Clicking a job will open it in the center panel. The center panel contains the job definition, organized in tabs. The right panel shows an example document, which is the last document selected in the pending list of the main Image Manager window. The example images show OCR and barcode data found in the sample, and provide a drawing surface when zones are being defined.
The toolbar provides several buttons, to save the current definition, add a new definition, or delete the current definition. If a sample document is loaded additional buttons are enabled to test the current job and view document results. A 'save as' function is performed by entering a new job name and pressing the Save button. As long as there is no existing job with that name, a new definition is created.
Job Export and Import
The search, download, and upload buttons perform functions across job definitions, and provide the means to identify and deploy sets of jobs to other UnForm installations.
•The search button will prompt for text or a regular expression (~pattern entry) and check any job that contains that text. This is useful to locate jobs with specific filters, script variables, or other criteria.
•The download button exports checked jobs, as well as script library routines those jobs require, to a special file with a .ufimjobs extension. This file can be transported to another installation.
•The import button will prompt for a file, which is then imported, adding or updating jobs and script libraries. The server log is written for this import activity. In addition, a dated backup zip file is created in the "im/backups" directory, containing the jobs master file and script library files from before the import.
